Here I will be discussing the new concept of Amazon AppFlow with Salesforce. Amazon AppFlow grants automate workflows to heighten business productivity by triggering information flows supported events.
This I believe a big achievement between SAAS based system over the Internet. As we know the data always a crucial part of any system and to keep data in a secure place is the big challenge for any industry or any SAAS based system. In terms of storage, Salesforce is a bit expensive to keep all the historical data in the organization. we use multiple resources to keep the data and sometimes it took time to retrieve the data from those resources.
In terms of security AWS use the Private Link to make the data flow between AWS and Salesforce.
There is another important role that Amazon AppFlow provide is to transfer the data from S3, RDS, Amazon Redshift to salesforce object. we can say App Flow provide two-way communication between AWS and any other SAAS(i.e salesforce) based system.
Salesforce coordinates with AWS services (Amazon AppFlow) to flow the data securely and keep those data in their platform like S3, RDS, Amazon Redshift.
Let’s take a quick tour of how we can store or Flow the Salesforce Account (This is one of the object or table in salesforce) data to AWS S3 bucket
Step 1:
If you do not have salesforce org please create the Developer org.
Step 2:
Go to your AWS console and create an IAM user with the permission of S3 bucket and the Amazon AppFlow.
Step 3:
Logged in through he credential provided by the AWS.Go to the S3 bucket Service and create the bucket with any name (i.e Salesforce Account Object).
Step 4:
Now we have the bucket and the salesforce org in place, it’s time to play with the flow.
Select the Amazon AppFlow service from your service menu.
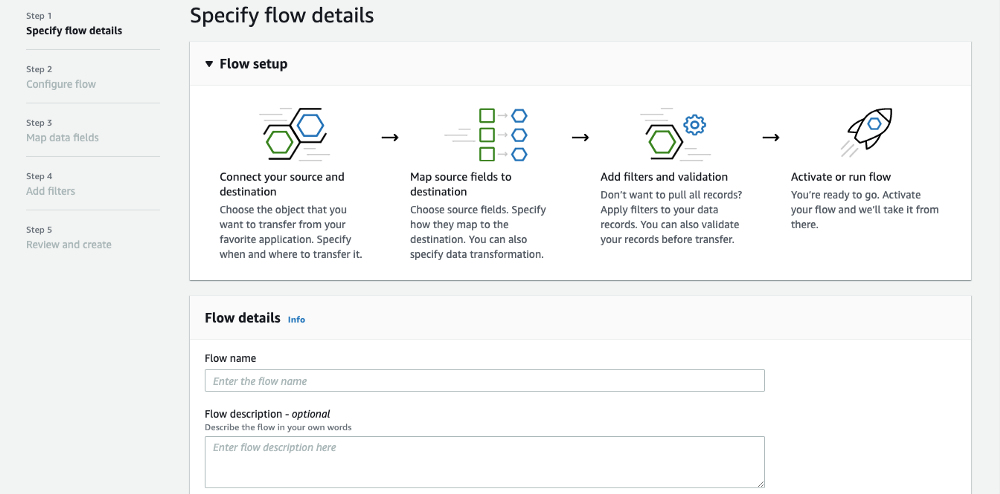
Step 5:
Next, we need to select our data source which is salesforce. Go to connect and it will populate the login screen of the salesforce please log in with the credentials.
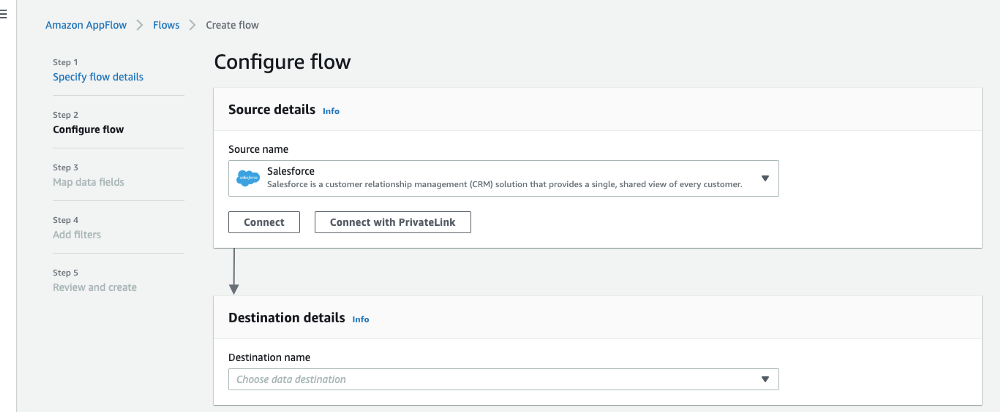
Step 6:
Here you will have an option to connect with Production or the sandbox. please select the production because you are connected with the dev org. This depends on you whether you want this with testing (sandbox) or the production.
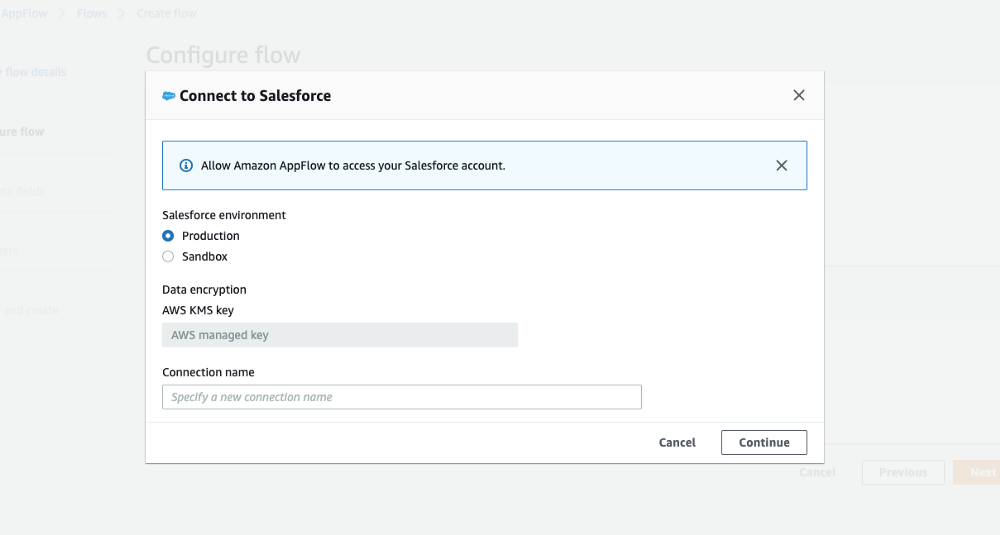
Step 7:
After that, it will ask you to select the Object or the event. Here we choose the salesforce object (Account).
Second is select the Destination where we will be storing all the records of the account Object. Select your S3 bucket in the Destination Details selection.
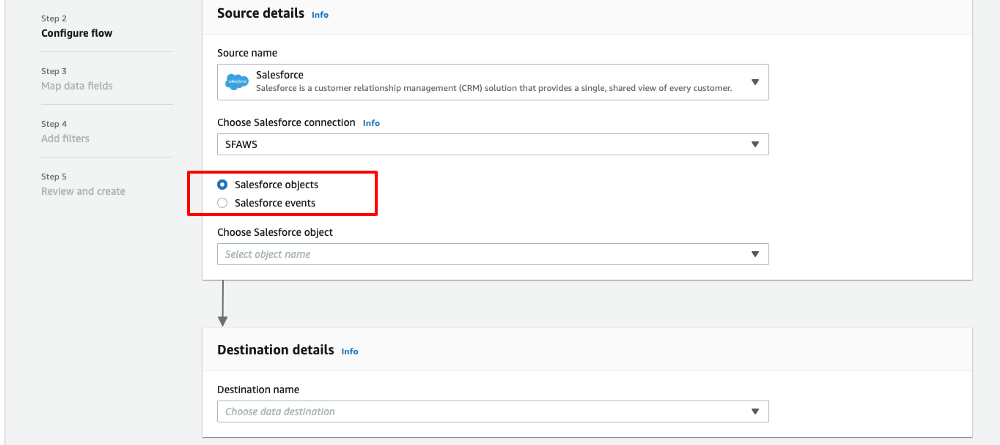
Step 8:
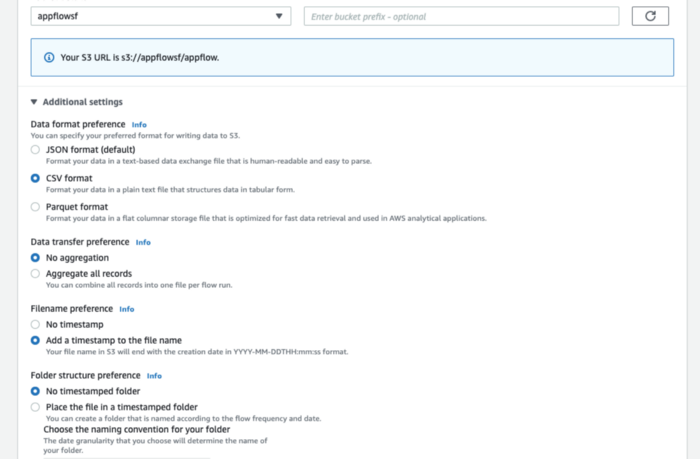
After the object Selection, we have Additional setting to configure.
1. Data format preferences: Here we can choose the format of the data is being stored.
2. Data transfer preferences: Aggregate the record or make this individual.
3. Filename Preferences.
4. Folder Structured Preferences.
Step 9:
Next is choose How to trigger the flow. we have Three option
1. Run On-Demand.
2. Run flow on Schedule.
3. Run Flow on Event.

Step 10:
Next, Source to destination field mapping. Here we select the field to map with the destination folder.
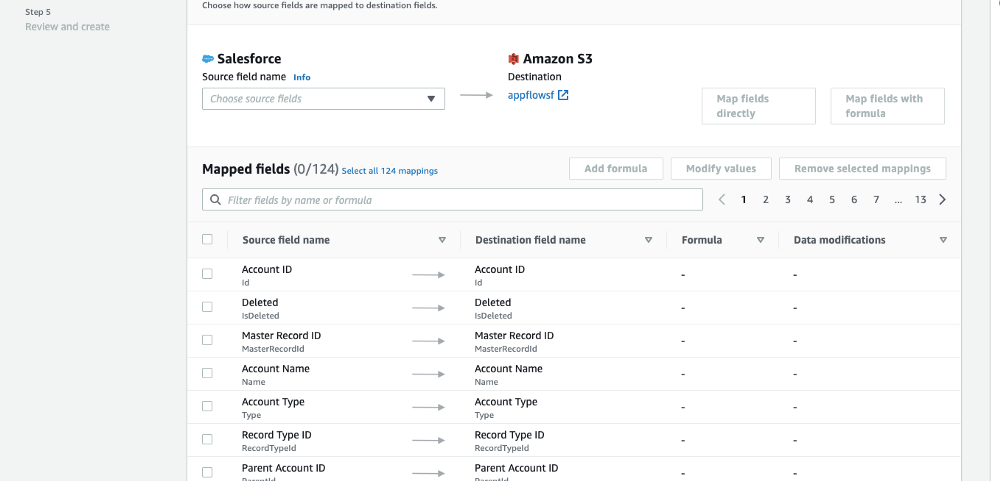
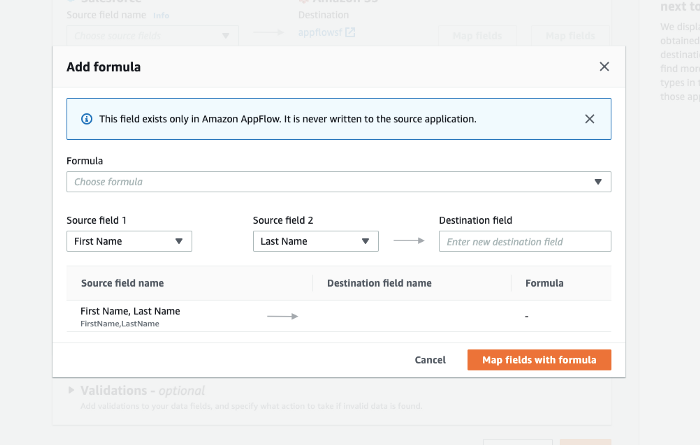
As you can see on the top we have an Option like Add formula and Modify values. The formula has a various method to calculate the fields based on other fields.
Step 11:
Next, we have another option that is validation. Add validations to your data fields, and specify what action to take if invalid data is found.

Step 12:
Add filters to your data fields. Amazon AppFlow will transfer only records that meet the filter criteria.

Step 13:
Now the climax time. we have an option to run the flow. Click the button to execute the flow and you will get the summary report with all the details.
Please check the S3 bucket you will have the data with the given format.

I hope you find this information useful and let me know if you have any difficulties to connect the AWS with Salesforce.


